Codex app
The Codex desktop app reads the same ~/.codex/config.toml as Codex CLI —
there’s no separate app-specific config format, and configuring one surface configures the other.
Connect to a server (OAuth) — recommended
Section titled “Connect to a server (OAuth) — recommended”If someone — you, or someone in your household — is running the self-hosted server, this is the recommended way to connect: you log into YNAB with your own account instead of sharing a token. Add its URL instead of a command:
[mcp_servers.ynab]url = "https://<your-hostname>/mcp"The app’s OAuth login for MCP servers runs through the same flow the CLI’s codex mcp login
triggers — log into YNAB and choose read-only or full access when prompted. If the app doesn’t
surface a login prompt automatically, run codex mcp login ynab from a terminal; both share the
same config and the same stored credentials.
Alternate: stdio + Personal Access Token
Section titled “Alternate: stdio + Personal Access Token”No server to run, but a single token stands in for your own login — the right trade when you’re
the only person using this. Add this to ~/.codex/config.toml (by hand, or via codex mcp add
from a terminal — see the Codex CLI page for that command):
[mcp_servers.ynab]command = "npx"args = ["-y", "@redlinelabs/ynab-mcp"]
[mcp_servers.ynab.env]YNAB_TOKEN = "your-personal-access-token"YNAB_BUDGET_ID = "last-used"
Restart the app. See the Quick start for where to get a token.
What it looks like
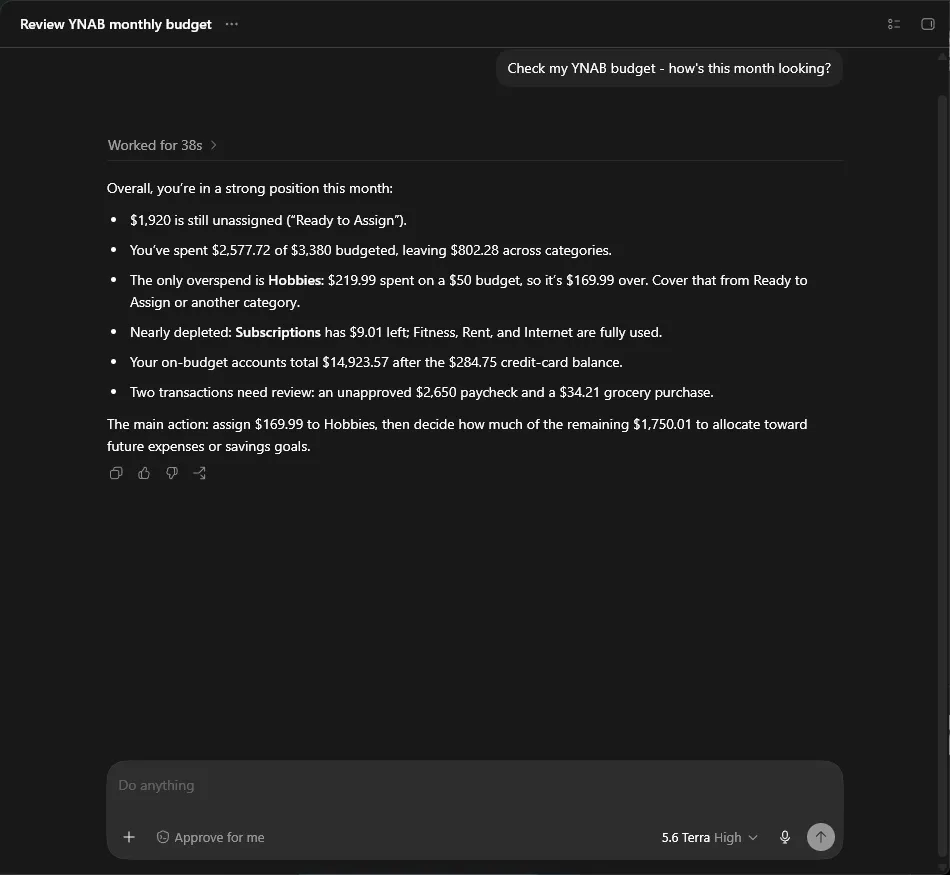
Section titled “What it looks like”A real Codex app session against demo mode — a fictional budget, no credentials. Tip: naming YNAB in your prompt (“Check my YNAB budget…”) is the reliable way to get Codex to reach for the tools on the first try.